

Overview #
The Menu Builder is an intuitive tool designed for users of Portify and Business Portify, allowing you to create, customize, and manage navigation menus for your website. It provides a user-friendly interface that simplifies the process of organizing your site’s pages and links.
Key Features #
- Drag-and-Drop Interface
- A user-friendly experience to rearrange menu items easily.
- Multi-Level Menus
- Create nested menus to better organize your site’s content.
- Responsive Design
- Menus that adapt seamlessly to various screen sizes.
- Customizable Styles
- Apply different styles and themes to fit your brand identity.
- Link Management
- Add, edit, or remove links to any pages within your site.
Getting Started with Menu Builder #
Accessing Menu Builder #
To access the Menu Builder, log in to your Portify or Business Portify account, navigate to the Dashboard, and select the Menu Builder option from the main menu.
Creating a New Menu #
- Click on the Create New Menu button.
- Enter a name for your new menu.
- Click Save to initialize your new menu.
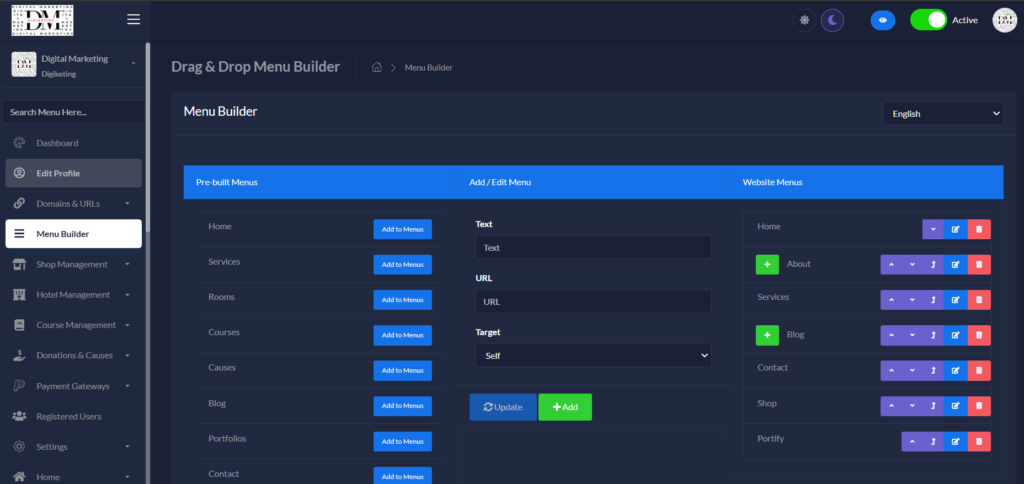
Adding Menu Items #
Once you have created a menu, you can start adding items:
- Select the Add Menu Item option.
- Enter the title and URL for the new item.
- Specify if you want the item to be a dropdown (nested item) or a top-level item.
- Click Add Item to save your changes.
Organizing Menu Items #
Rearranging Items #
To change the order of your menu items, simply drag and drop them into your desired position.
Creating Submenus #
To create a submenu, drag a top-level menu item beneath another menu item, and it will automatically become a child of that item, forming a dropdown.
Customizing Your Menu #
Styling Your Menu #
Menu Builder allows you to apply customized styles to your menus. This includes fonts, colors, and hover effects. Access the Design Settings from the menu options.
Mobile Responsiveness #
Ensure your menu looks great on all devices by using the responsive settings. You can preview how your menu will appear on mobile devices within the Menu Builder interface.
Publishing Your Menu #
After creating and customizing your menu, the final step is to publish it. This can be done with a single click of the Publish button.

Troubleshooting Common Issues #
Menu Not Appearing on Site #
If your menu isn’t displaying as expected, check the following:
- Ensure the menu is published.
- Confirm that the menu is assigned to the correct location in your theme settings.
- Check for any caching issues that might affect its display.
Links Not Working #
If you encounter links that do not lead to the desired pages, verify each link URL in the Menu Builder for accuracy.
Best Practices for Menu Structuring #
A well-structured menu improves user experience and navigation on your website. Here are some tips:
- Limit top-level items to five or six for clarity.
- Use descriptive labels for each menu item.
- Organize items based on priority and user journey.
Advanced Features #
Integrating with Other Tools #
Menu Builder can be integrated with various other tools such as analytics platforms and SEO tools for enhanced performance tracking.
Custom Code Integration #
If you have coding knowledge, you can add custom CSS or JavaScript to further enhance the functionality of your menus.
Conclusion #
The Menu Builder is a powerful tool within Portify and Business Portify that streamlines the process of menu creation and management. By following the instructions in this documentation, you can easily set up a functional and aesthetically pleasing menu for your website.


Leave a Reply